


Fashion Designing Diploma Institute Course In Nagpur Selai Boutique


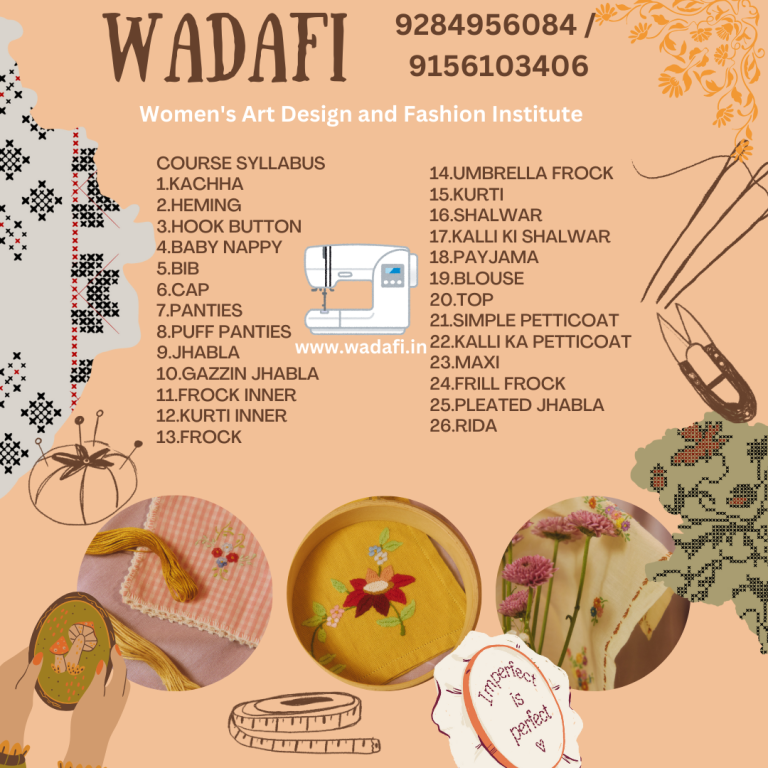
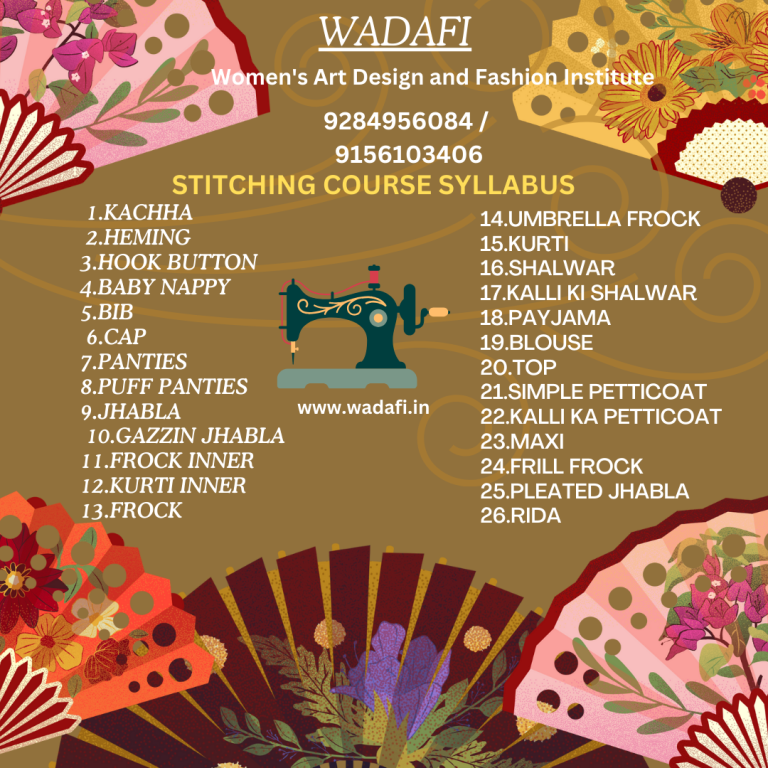
WADAFI ( Women’s Art Design and Fashion Institute )
A. Fashion Designing & Tailoring Classes
i. Fashion illustration (sketching)
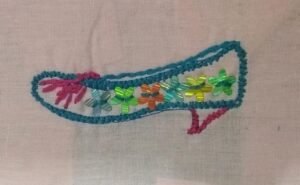
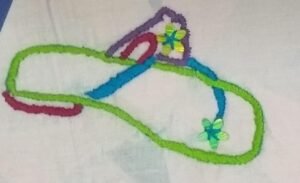
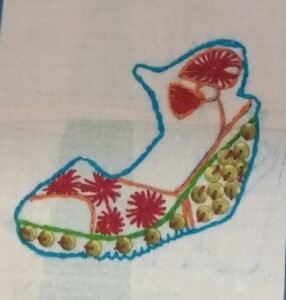
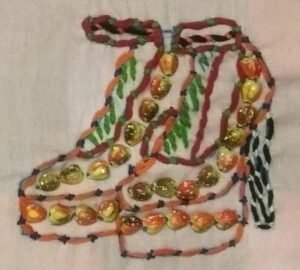
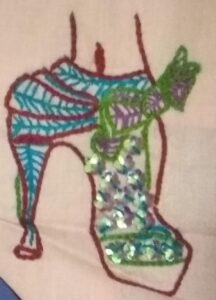
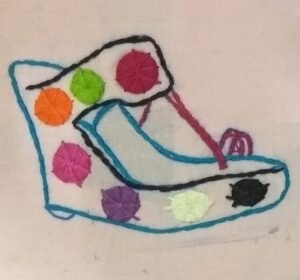
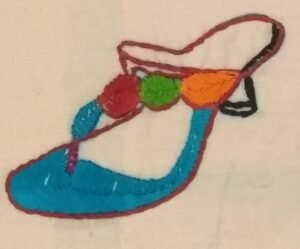
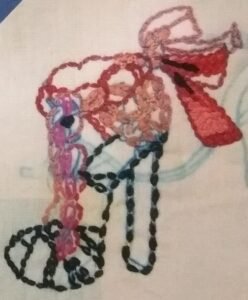
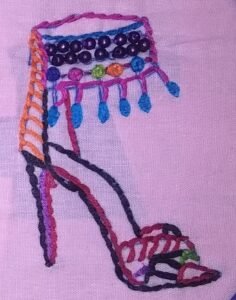
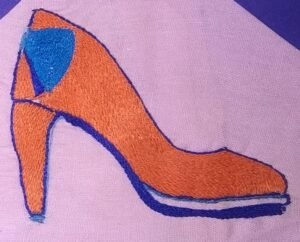
ii. Hand Embroidery
iii. Machine Embroidery
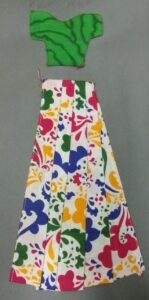
iv. ladies wear
v. kids wear
Pattern making, Drafting, Cutting & Stitching etc.
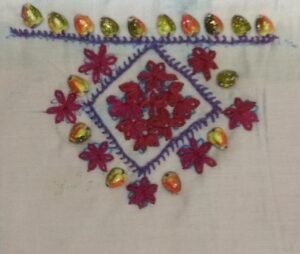
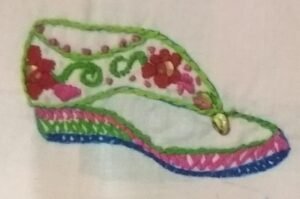
B. Hand Embroidery ( 101 types of Stitches Covered like…
i. Running Stitch
ii. Back Stitch
iii. Russian Knot
iv. Bullian Knot
v. Different Regional embroideries etc.
Machine Embroidery : In Machine Embroidery 40 to 50 types of Stitches covered.
C. Ladies Wear:
i. Body Measurement
ii. Drafting without body measurement
iii. Simple A-line Kurti Stitching & Cutting
iv. @ Kali to 36 Kali Kurtis Cutting & Cutting
v. Different types of bottoms
vi. Kurtis with yoke pattern & Patch work.
vii. Different types of colors
viii. Anghrakha pattern
ix. Blouses Varieties.
x. Nighties Peticoats etc.
xi. Different types of neck & Sleeves Variations
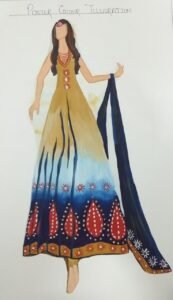
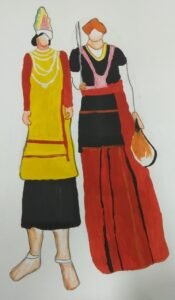
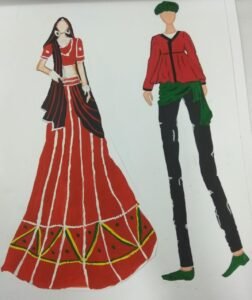
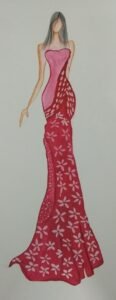
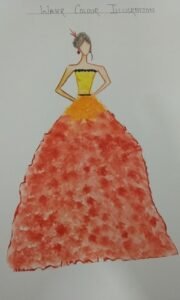
D. Fashion illustration using different color mediums techniques
i. Formal wear sketching
ii. Bridal wear sketching
iii. Regional Sketching etc.
E. Courses Available ==========
1 year Diploma Course
6 Months Advance Certificate Course
3 Months Advance Certificate Course
Fees : In Two Installments
Certificate : students will be awarded certificate on successful completion of the course .
FOR ENQUIRY ANF REGISTRATION CALL == OR WHATSAPP==
Mrs. Jiya Jeswani
0091- 9156103406 / 9284956084
Fashion Designing Diploma Institute Course In Nagpur Selai Boutique
Article : Fashion Designing : illustration block printing tie and diy fabric painting accessories making join complete stiching cutting designing and drafting complete practical training.
using simple and fashion designing machine’s basic machines repairing technique stitching technique dress measurement and technique calculating of drafting pattern method to fold the fabric for pattern term used in tailoring pico with wire or without wire making designer necks sleeves using designer machine design alphabets using designer machine dress dori making handmade bouton making how to used can cane latkan making matric sysytem illustration handkerchief nappies simple circle heart shape pillow cover making simple cover making fancy pillow cover making cover using laces using stones using frill using patches using readymade flowers table cloth making simple using frill using patch using laces ands stones market bag making simple using designer cloth using various fabrics etc. hand work on cloth simple lace work resham work knots.
skiirt umbrella plated nandini pattern up and down wrapped and round corporate four gore skirt designer peplum handkerchief hem mini skirt slip short long spegity
kurti simple kurti designer kurta single cut three cut with side and back dori with chain with jacket pattern panjabi short kurta with apple cut princess cut anarkali pattern full umbrella
kurti neck pattern regular simple neck round neck square neck v neck boat neck
difficult with collar using net using stones and dori using overlapping technique heavy neck designs using fused
sleeves pattern simple short sleeves 3/4 sleeves full sleeeves net sleeves cold shoulder sleeves puff sleeves balloon sleeves cut sleeves umbrella sleeves gathered shoulder sleeves overlap sleeves designer using beets and laces
salwar front plates only both side plates semi patiyala full patiyala dhoti pattern chudidar
salwar bottom triangle semi circle
blouse simple front hoocks back hoocks tucks blouse 2 tucks to 4 tucks princess cut spegity blouse with cups designer katori blouse back blouse design collar with open back neck halters neck blouse inbuilt collar back less using 2 cloths using patches
peticoat 2 pieces 6 pieces peticote one piece simple dress long evening gown yoke gown princess pattern.
standard measurement for tops
varity of pockets square round side pocket
tops crop top long top up and down top circular top spegity top loose straight top pack net top kaftan pattern one side open top smoking top fall neck top overlap top back less halter neck top tank top
lacha 2 types mermaid style with straps
pants long pant capri shorts wrap and round pants dungaree jumpsuit
palazzo circle palazzo straight fit palazzo
jacket shrugs short jackets long jackets long jackets frill jacket curtains shirt
Fashion Designing Diploma Institute Course In Nagpur Selai Boutique
article :Basic tailoring: introduction and cushion cover cutting and stitching introduction to pattern cutting tools grain line type of thread selvage types of fabric as a beginner and laying of the pattern introduction to sewing machine how to take measurements cushion cover cutting and sewing
women crop top cutting and stitching women crop top cutting on paper and fabric stitching
women skirt cutting and sttching women umbrella skirt cutting paper and fabric stitching
kurti 1 cutting a line and full sleeves kurti cutting on paper fabric details
salvar stitching a line and full salvar cutting on paper stitching using fabric
blouse 1 cutting and sewing basic blouse cutting and sewing
drafting cutting stitching complete pratical training
class all students get together party on last day and certificate distribution programme
what you get completion certificate notes and assignments
Fashion Designing Diploma Institute Course In Nagpur Selai Boutique
Article : tailoring course : machine introduction tool introduction machine care basic repairing technique theory of contents metric system measurement from cloth from body basic straight stitching plates frill darts handkerchiefs nappy table cover circular using frill pillow making circular rectangle pillow cover making circular rectangular using 2 cloths market bag simple skirt umbrella plated box plated single plated kitchen apron frock simple body slip kurti with simple sleeves short 3/4 long
kurti with simple neck u neck square neck v neck boat neck salwar ultration frock with separate body and skirt simple blouse pouch with zipper hoocks and buttons hamming basic pockets.
pico dori making hand made button making skirt up and down namdini or mumtaz pattern wrap and round any designer evening gown any one necks front flip collar using beats using laces collar neck with opne back heart shape sleeves long sleeves puff sleeves cap sleeves umbrella
punjabi kurta apple cut slant front cut other ulteration petticoat simple blouse tucks single tuck 2 tuck 3 tuck princes cut blouse katori blouse patiyala.
Fashion Designing Diploma Institute Course In Nagpur Selai Boutique
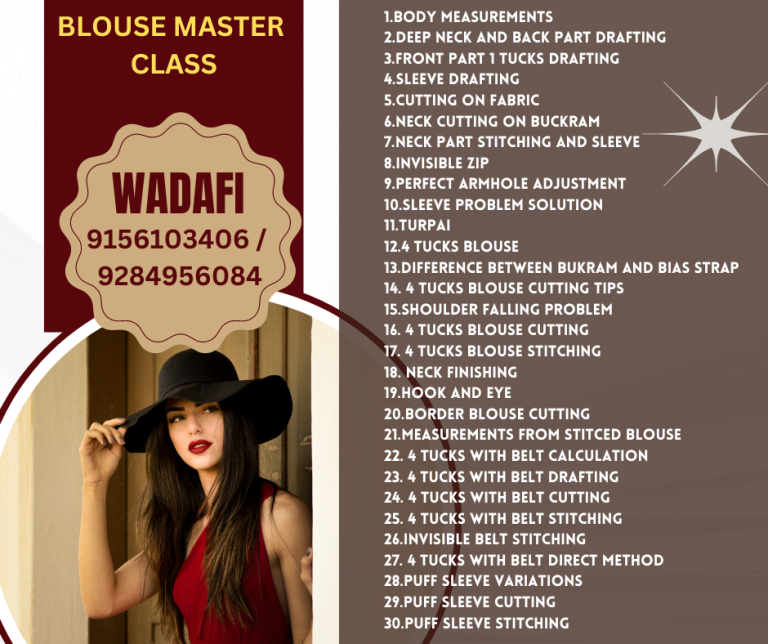
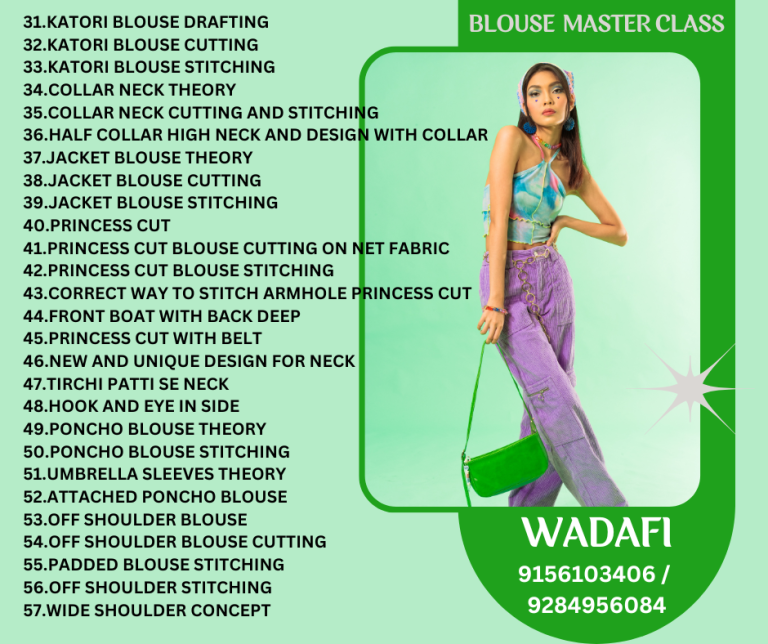
Article: Blouse designing course : how to stitch houks how to stitch zip how to use elastic in blouse how to stitch press buttons how to make 5 different type of sleeves how to do readymade stitch how to make neck from cross strips 5 different types of neck simple blouse single tuck blouse 2 tuck blouse 3 tuck blouse four tuck blouse princesses cut blouse kothari blouse half net half cloth blouse spegity blouse net shoulder blouse overlap blose how to do piping on blouse.
Description : Fashion Designing & Tailoring Classes :-
Hand Embroidery :-
Ladies Wear :-
Fashion illustration using different color mediums techniques :-
BLOCK NO 338 OPP KAMBAR DARBAR BACKSIDE OF UNION BANK JARIPATKA BRANCH, NAGPUR, Maharashtra 440014, India
CALL 0091-9156103406 / 9284956084 ( Direct Whatsapp Click Here)

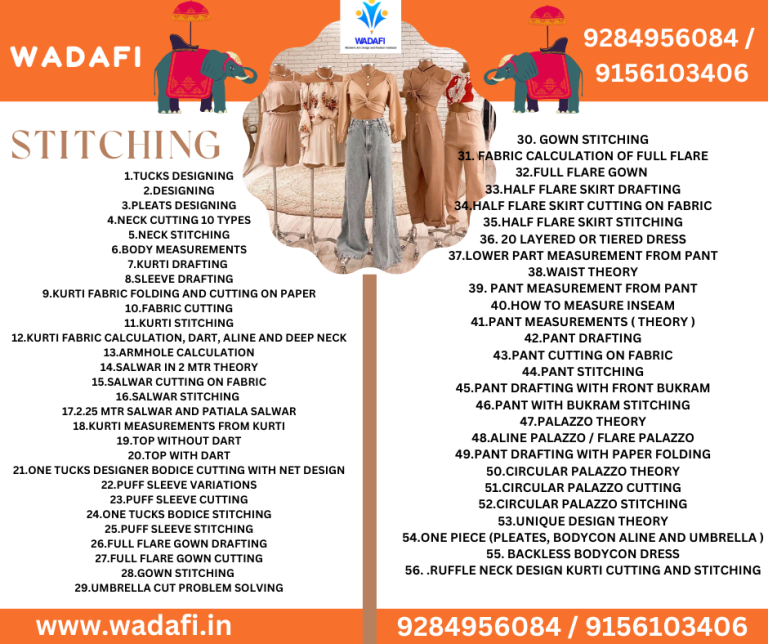
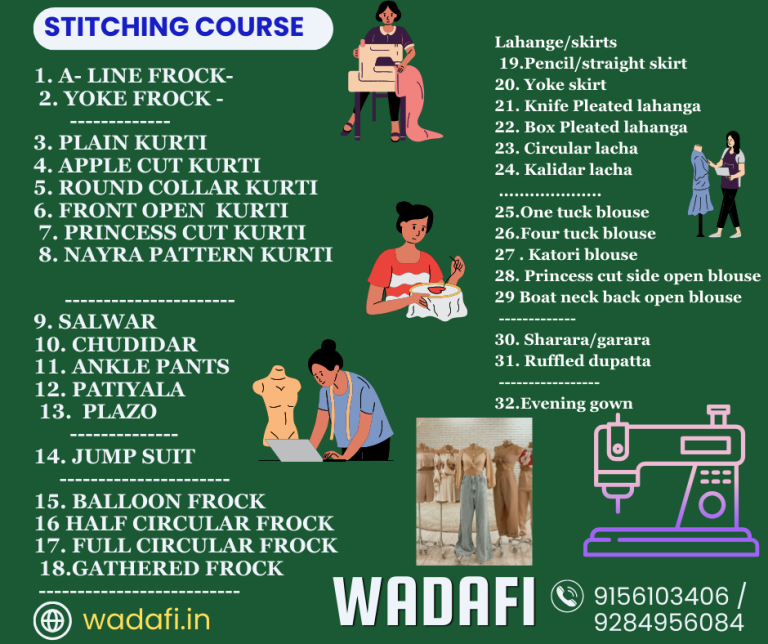
Stitching course
1. A- line frock
2. Yoke frock
————-
3. Plain kurti.
4. Apple cut kurti.
5. Round collar kurti
6. Front open kurti
7. Princess cut kurti
8. Nayra pattern Kurti
———————-
9. Salwar
10. Chudidar
11. Ankle pants
12. Patiyala
13. Plazo
————–
14. Jump suit
———————-
15. Yoke frock
16. Balloon frock
17. Half circular frock
18. Full circular frock
19.Gathered frock
————————–
Lahange/skirts
20.Pencil/straight skirt
21. Yoke skirt
23. Knife Pleated lahanga
24. Box Pleated lahanga
25. Circular lacha
26. Kalidar lacha
………………..
27.One tuck blouse
28.Four tuck blouse
29 . Katori blouse
30. Princess cut side open blouse
31. Boat neck back open blouse
————-
32. Sharara/garara
33. Ruffled dupatta
—————–
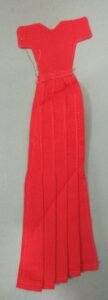
34.Evening gown
### 1. A-line Frock
Description:
An A-line frock is characterized by its fitted bodice that gradually widens towards the hem, resembling the shape of the letter “A.” This style is flattering for all body types.
Stitching Process:
1. Measure and cut the fabric.
2. Sew the bodice darts.
3. Attach the bodice to the skirt part.
4. Finish with a hem and attach any closures like zippers or buttons.
—
### 2. Yoke Frock
Description:
A yoke frock features a distinct upper part (yoke) that is often adorned with embellishments or made from a different fabric, adding a stylish touch to the dress.
Stitching Process:
1. Cut the yoke and bodice pieces.
2. Sew the yoke to the bodice.
3. Attach the skirt part to the yoke.
4. Finish with hems and closures.
—
### 3. Plain Kurti
Description:
A plain kurti is a simple, straight-cut tunic that can be worn casually or dressed up with accessories.
Stitching Process:
1. Measure and cut the fabric for the front and back panels.
2. Sew the shoulder and side seams.
3. Attach sleeves.
4. Finish the neckline, hem, and sleeve edges.
—
### 4. Apple Cut Kurti
Description:
An apple cut kurti has a curved hem that is shorter in the front and longer in the back, resembling the shape of an apple slice.
Stitching Process:
1. Cut the fabric with the distinctive curved hem.
2. Sew the shoulder and side seams.
3. Attach the sleeves.
4. Finish with a neckline, hem, and edges.
—
### 5. Round Collar Kurti
Description:
This kurti features a round collar, adding a formal touch to the traditional tunic style.
Stitching Process:
1. Cut the front and back panels and sleeves.
2. Sew the shoulder and side seams.
3. Attach the sleeves.
4. Construct and attach the round collar.
5. Finish hems and edges.
—
### 6. Front Open Kurti
Description:
A front open kurti has an opening along the front, usually fastened with buttons or hooks.
Stitching Process:
1. Cut the fabric for the front and back panels.
2. Sew the shoulder and side seams.
3. Attach the sleeves.
4. Add a placket for the front opening.
5. Sew buttons or hooks and finish hems and edges.
—
### 7. Princess Cut Kurti
Description:
This kurti style features princess seams that create a tailored fit, enhancing the wearer’s silhouette.
Stitching Process:
1. Cut the fabric with princess seams.
2. Sew the princess seams and side seams.
3. Attach the sleeves.
4. Finish with neckline, hem, and edges.
—
### 8. Nayra Pattern Kurti
Description:
The Nayra pattern kurti features intricate cuts and designs, often with a flared silhouette.
Stitching Process:
1. Cut the fabric according to the Nayra pattern.
2. Sew the shoulder and side seams.
3. Attach the sleeves.
4. Add any additional design elements.
5. Finish with hems and edges.
—
### 9. Salwar
Description:
A salwar is a traditional Indian trouser with a baggy fit that tapers at the ankles.
Stitching Process:
1. Measure and cut the fabric.
2. Sew the side seams.
3. Create a casing for the waistband and insert elastic.
4. Hem the ankles.
—
### 10. Churidar
Description:
Churidar is a variation of the salwar but fits tightly along the legs with multiple folds near the ankles.
Stitching Process:
1. Measure and cut the fabric.
2. Sew the side seams and create a fitted shape.
3. Create a casing for the waistband and insert elastic.
4. Finish with a hem.
—
### 11. Ankle Pants
Description:
Ankle pants are slim-fit trousers that end at the ankle, offering a modern, stylish look.
Stitching Process:
1. Measure and cut the fabric.
2. Sew the side seams and crotch.
3. Add a waistband and insert elastic.
4. Hem the ankles.
### 12. Patiala
Description:
Patiala salwar is a baggy, pleated trouser that offers a traditional and comfortable fit.
Stitching Process:
1. Measure and cut the fabric with ample width for pleats.
2. Sew the side seams and pleats.
3. Create a casing for the waistband and insert elastic.
4. Hem the ankles.
—
### 13. Palazzo
Description:
Palazzo pants are wide-legged trousers that offer a breezy and comfortable fit.
Stitching Process:
1. Measure and cut the fabric.
2. Sew the side seams and crotch.
3. Add a waistband and insert elastic.
4. Hem the legs.
—
### 14. Jumpsuit
Description:
A jumpsuit is a one-piece garment that combines a top and trousers, offering a chic and modern look.
Stitching Process:
1. Measure and cut the fabric for the top and bottom parts.
2. Sew the top and bottom parts together.
3. Attach sleeves if necessary.
4. Add closures and finish hems and edges.
—
### 15. Yoke Frock (Repeat)
Refer to section 2 for details.
—
### 16. Balloon Frock
Description:
A balloon frock features a voluminous skirt that creates a balloon-like effect.
Stitching Process:
1. Measure and cut the fabric for the bodice and skirt.
2. Sew the bodice and attach the skirt.
3. Add gathers to create the balloon effect.
4. Finish with hems and closures.
—
### 17. Half Circular Frock
Description:
This frock has a skirt that forms a half circle, providing a flared silhouette.
Stitching Process:
1. Cut the fabric in a half-circle shape.
2. Sew the bodice and attach the skirt.
3. Finish with hems and closures.
—
### 18. Full Circular Frock
Description:
A full circular frock has a skirt that forms a complete circle, offering maximum flare.
Stitching Process:
1. Cut the fabric in a full-circle shape.
2. Sew the bodice and attach the skirt.
3. Finish with hems and closures.
—
### 19. Gathered Frock
Description:
This frock style features gathers at the waist, creating a full and flowing skirt.
Stitching Process:
1. Cut the fabric for the bodice and skirt.
2. Sew gathers into the skirt.
3. Attach the skirt to the bodice.
4. Finish with hems and closures.
—
### Lahange/Skirts
#### 20. Pencil/Straight Skirt
Description:
A pencil skirt is a fitted, straight-cut skirt that ends at or just below the knee.
Stitching Process:
1. Measure and cut the fabric.
2. Sew the side seams.
3. Add a waistband and zipper.
4. Finish with a hem.
—
#### 21. Yoke Skirt
Description:
A yoke skirt features a fitted yoke at the waist, with the skirt portion often flaring out.
Stitching Process:
1. Cut the yoke and skirt pieces.
2. Sew the yoke to the skirt.
3. Add a waistband and zipper.
4. Finish with a hem.
—
#### 23. Knife Pleated Lehenga
Description:
This lehenga has sharp, narrow pleats that provide a structured look.
Stitching Process:
1. Measure and cut the fabric with extra width for pleats.
2. Sew the pleats.
3. Attach a waistband and closure.
4. Hem the bottom.
—
#### 24. Box Pleated Lehenga
Description:
A box pleated lehenga features wider, box-like pleats for a voluminous skirt.
Stitching Process:
1. Measure and cut the fabric with extra width for box pleats.
2. Sew the box pleats.
3. Attach a waistband and closure.
4. Hem the bottom.
—
#### 25. Circular Lacha
Description:
A circular lacha has a skirt that forms a complete circle, similar to a full circular frock but traditionally styled.
Stitching Process:
1. Cut the fabric in a full-circle shape.
2. Sew the waist and add a waistband.
3. Finish with closures and hems.
—
#### 26. Kalidar Lacha
Description:
A kalidar lacha consists of multiple panels (kalidar) that create a flared skirt.
Stitching Process:
1. Cut the fabric into panels.
2. Sew the panels together.
3. Attach a waistband and closure.
4. Hem the bottom.
### 27. One Tuck Blouse (continued)
Stitching Process:
1. Measure and cut the fabric for the front, back, and sleeves.
2. Create the tuck on the front piece.
3. Sew the shoulder and side seams.
4. Attach the sleeves.
5. Finish with the neckline, hems, and edges.
—
### 28. Four Tuck Blouse
Description:
A four tuck blouse has four tucks on the front, giving it a structured and elegant appearance.
Stitching Process:
1. Measure and cut the fabric for the front, back, and sleeves.
2. Create four tucks on the front piece.
3. Sew the shoulder and side seams.
4. Attach the sleeves.
5. Finish with the neckline, hems, and edges.
—
### 29. Katori Blouse
Description:
The Katori blouse features rounded cups (katori) for a well-fitted bust area, offering a tailored and comfortable fit.
Stitching Process:
1. Measure and cut the fabric for the front, back, and sleeves.
2. Create the katori (cup) pieces and sew them together.
3. Sew the katori pieces to the front bodice.
4. Sew the shoulder and side seams.
5. Attach the sleeves.
6. Finish with the neckline, hems, and edges.
—
### 30. Princess Cut Side Open Blouse
Description:
This blouse features princess seams for a tailored fit and an opening on the side for ease of wearing.
Stitching Process:
1. Measure and cut the fabric with princess seams.
2. Sew the princess seams and side seams, leaving an opening on one side.
3. Attach the sleeves.
4. Add a side closure (zipper or hooks).
5. Finish with the neckline, hems, and edges.
—
### 31. Boat Neck Back Open Blouse
Description:
A boat neck blouse with a back opening adds a modern twist to traditional blouse designs, offering elegance and style.
Stitching Process:
1. Measure and cut the fabric for the front, back, and sleeves.
2. Sew the shoulder and side seams.
3. Attach the sleeves.
4. Create a boat neckline.
5. Add a back opening with a closure.
6. Finish with hems and edges.
—
### 32. Sharara/Garara
Description:
Sharara or Garara are wide-legged pants that flare out from the knee, often paired with a short kurti.
Stitching Process:
1. Measure and cut the fabric for the pants.
2. Sew the side seams and crotch.
3. Create a flare by adding extra fabric panels from the knee down.
4. Add a waistband and insert elastic.
5. Hem the bottom edges.
—
### 33. Ruffled Dupatta
Description:
A ruffled dupatta features decorative ruffles along the edges, adding a feminine and stylish touch to the outfit.
Stitching Process:
1. Measure and cut the fabric for the dupatta.
2. Create ruffles by gathering fabric strips and sewing them along the edges.
3. Finish with hemming and any additional embellishments.
—
### 34. Evening Gown
Description:
An evening gown is a formal dress designed for evening events, often featuring luxurious fabrics and elegant cuts.
Stitching Process:
1. Measure and cut the fabric for the bodice and skirt.
2. Sew the bodice pieces together.
3. Attach the skirt to the bodice, adding any pleats or gathers as needed.
4. Sew the side seams and attach sleeves if applicable.
5. Add a zipper or other closure.
6. Finish with hems and any decorative elements.
—
This comprehensive stitching course covers a wide range of garments, providing students with the skills needed to excel in fashion design. Each topic includes detailed steps to guide students through the process, ensuring they gain practical experience and confidence in their stitching abilities. This course is ideal for aspiring fashion designers in Nagpur looking to master the art of garment construction.
FASHION DESIGNING
- FASHION DESIGNER
- FASHION CONSULTANT
- FASHION STYLIST
- MERCHANDISER
- PRODUCT MANAGER
- FREELANCER
- ENTREPRENEURSHIP
- BRAND DEVELOPER
- BOUTIQUE BUSINESS
BOTTOMWEAR & PANT
- SIMPLE SALWAR
- PATIALA SALWAR
- STRAIGHT PALAZZO PANT
- CIRCULAR / SKIRT PALAZZO
- DHOTI PANT
- WRINKLE SALWAR
- HAREM PANT
- BAGGY PANT
- FLARED PALAZZO
- SHARARA PANT
- A LINE SKIRT
- STRAIGHT SLIT SKIRT
- HIGH LOW SKIRT
- CIRCULAR SKIRT
- BOX SKIRT / MINI SKIRT
- KNIFE PLEATED SKIRT
- BOX PLEATED SKIRT
- GATHERED SKIRT
- YOKE SKIRT
- FLARED SKIRT
FASHION DESIGNING COURSE
- LEARN TEXTILE
- DESIGNING
- DRAPING
- STYLING
- FASHION ILLUSTRATION
- DRAFTING
- STICHING
- PORTFOLIO
FASHION DESIGNING OPPORTUNITIES
- SELF EMPLOYED FASHION DESIGNERS
- TEACHING IN A FASHION DESIGNING INSTITUTE
- BOUTIQUES
- PATTERN MAKER COSTUME DESIGNER
- FASHION DIRECTOR / COORDINATOR
- FASHION ENTREPRENEUR
- FASHION WRITER / JOURNALIST / CRITIC
- BRANDED FASHION SHOWROOMS
- TELEVISION AND FILM INDUSTRY
- RETAIL CHAINS